Printing a document
To print a document:
- Click the
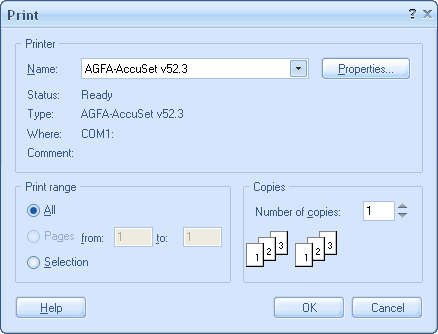
 Print item in the File menu or on the General toolbar. A standard Windows Printer dialog box will open.
The Print dialog box 
- Choose a printer and set its Properties if necessary.
- Specify the number of copies.
- Click Ok to proceed. The Printout Setup dialog box will open.
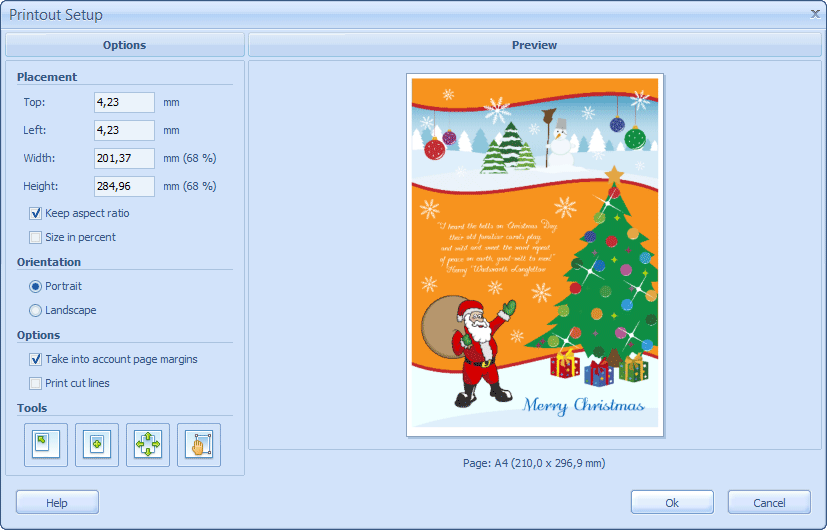
The Printout Setup dialog box 
In the Printout Setup dialog box you set the position of a print on a page. The left pane of the dialog box contains controls for setting up printing options. The Preview pane shows a printout on a page. Unprintable margins of a page a showed by a dashed rectangle. The page info can be found below the Preview pane. - Specify the Top and Left positions, the Width and the Height of a printout on a page. See Customizing the application for more info about how to change measurement units.
 Note: Most of printers have unprintable margins. Be careful for Top and Left positions not to overlap Top and Left unprintable margins.
 - Select Keep aspect ratio checkbox to adjust the size of the printout to document proportions.
- Select Size in percent checkbox to show the Width and the Height of a printout as a percent value from original document size. See Changing document size for more info about size of the document.
- Set the Orientation of a page if necessary.
- Specify additional options.
Select Print cut lines checkbox to print a thin black border around the document. This option is useful when you need to cut the resulting image from a sheet.
Select Take into account page margins checkbox to take into account the size of the not printable printer's physical margins when using Fast tools from the Tools section to set the printout position.
 Note: For example, to print certificates with clean fields, specify printout position to full page without page margins, even if your printer has real non printable margins. In this case the clean fields of the certificate will coincide with the not printable margins of the printer.
 - Use smart tools for a quick change of printout position on the page:


?Move Top Left - to move a printout to the top left printable corner of a page. 

?Move Center - to move a printout to the center of a page. 

?Fit to Page - to fit a printout to the printable part of a page. The Keep aspect ratio option is taken into account when fitting. 

?Set Manually - to manually set the placement of a printout on a page. The Preview pane will switch to active editing mode. Use special handlers to move and resize the placement of a printout.  Note: Please take into account that the page margins option affects the evaluation of the printout position on the page.
 - Click the Ok button to start printing a document.
 Note: If document size is large, printing may take some time. Please, wait till the command has been executed.
 Tip: See Customizing the application for more info about how to control print rendering quality.
 Related topics:
